Conducting 1:1 Conversations
- 03 May 2023
- 3 Minutes to read
- Contributors


- Print
- DarkLight
Conducting 1:1 Conversations
- Updated on 03 May 2023
- 3 Minutes to read
- Contributors
- Print
- DarkLight
Article Summary
Share feedback
Thanks for sharing your feedback!
Conducting 1 :1 Conversations
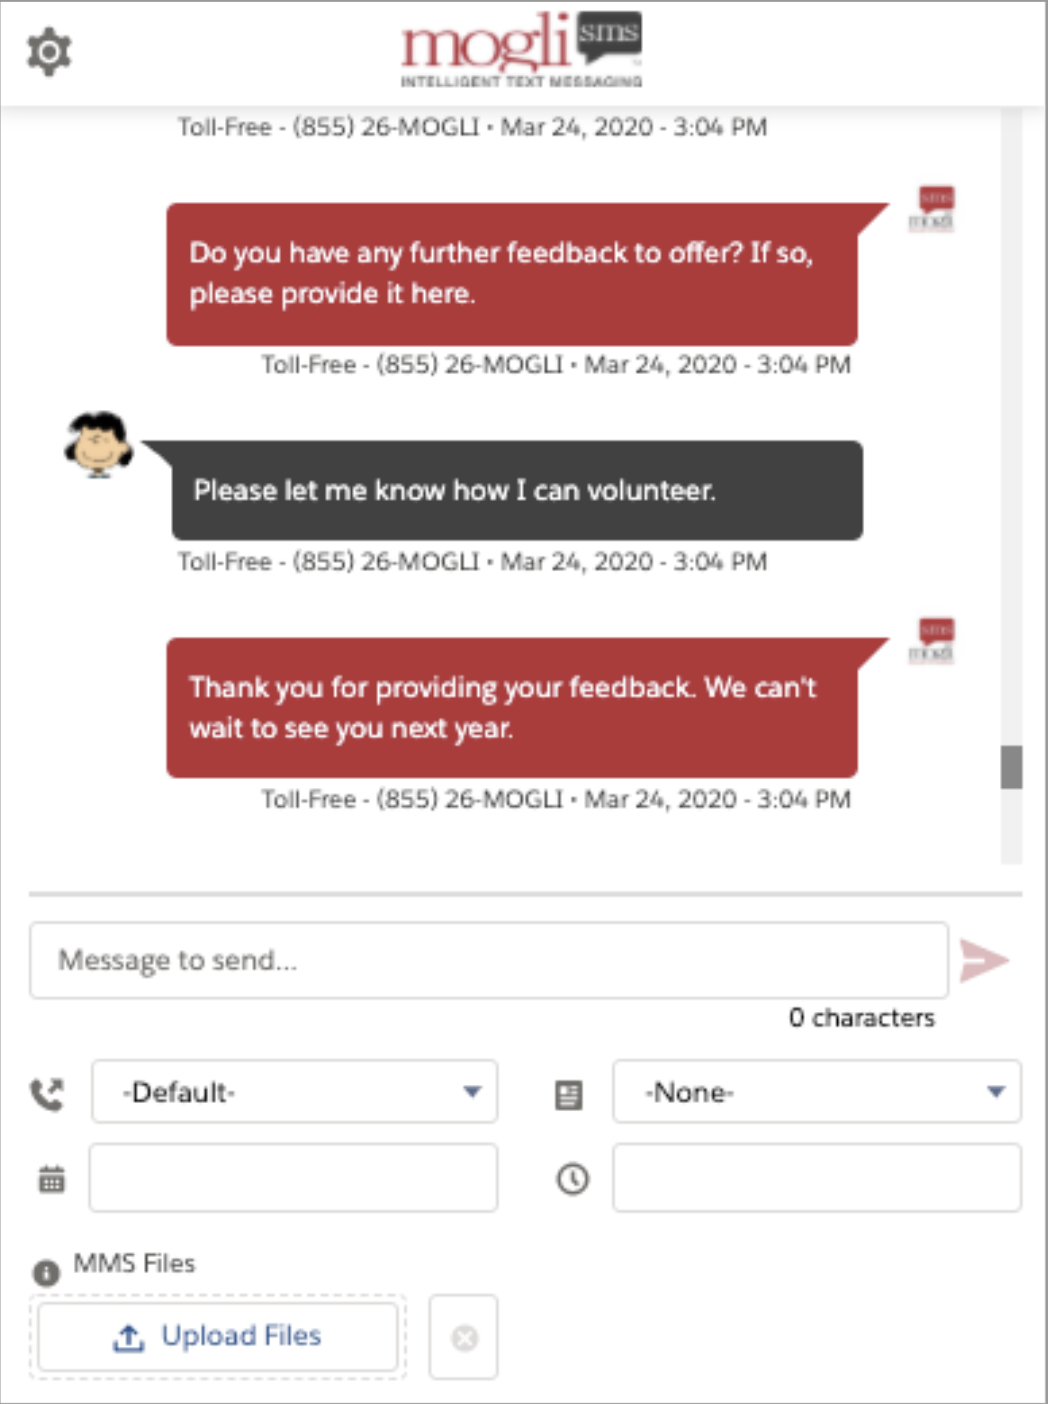
Conduct a Basic 1:1 Conversation
- Type directly in the message field
- Hit Enter or click the red arrow to send
- Your outgoing message will display immediately and incoming messages will display in real-time
IMPORTANT: It’s best practice to limit your messages to 160 characters or less. Most phones and carriers support up to 1600 characters, but we’ve found a higher response rate to shorter messages.
When considering message costs, each message segment is 160 characters. If Unicode or emoji are used, it reduces to 75 characters. For messages greater than 160 characters, you may be charged for an additional message segment.

While most carriers concatenate long messages so that they appear as a single message on the recipient's phone, some carriers don’t. Each message segment may be delivered separately. Be careful not to place a link where the message may be broken into another segment!
Use this SMS length calculator to see the length of your message and the types of characters within!
View our Consumption Standards for more information.
Select a Gateway (Optional)
Select the drop-down in the field with this icon:  If the selected value is -Default-, the text will be sent from the phone number as listed within the Default Gateway field on the record.
If there is no value in the Default Gateway field, the message will send from the Global Default Gateway as specified in Application Settings
Send an SMS Template (Optional)
Send a templated message or survey from the field with this icon:  No SMS Templates? See our SMS TEMPLATES section to get started.
Schedule a Message (Optional)
Enter the date and time your message is to be delivered in the fields with the  and
and  icons and send.
Considerations for Scheduled SMS:

Scheduled messages are sent based on the User’s time zone.
If you need to modify the date/time of your scheduled send, go to the SMS tab and select the SMS record itself, click Edit, modify your scheduled date/time, and Save.
(Optional) Assign a Mogli Avatar
By Default, incoming messages will display in Conversation View alongside a bubble containing their initials. You may replace the initials with an image:
- Right-click your chosen image
- Select the following option depending on your browser:
- Chrome and Safari - Copy Image Address
- Firefox - Copy Image Location
- Microsoft Edge - Copy Link
- Internet Explorer - Properties > select the URL to the right of the “address” heading, and press Ctrl + C on your keyboard
- Paste the URL in the Mogli Avatar URL field
- Save and refresh the record
Personalize Bubble and Text Colors for Your Outgoing Messages (Optional)
- Click the
 icon in the upper left corner of Conversation View
 - Select yourself as user in the user Filter drop-down menu
- Choose your Text and Bubble colors or enter hex codes and Save
 icon in the upper left corner of Conversation View
Admin Tip:
Configure text and bubble colors on behalf of users in two ways:
- Login as a user and select colors on their behalf
- From Setup > Custom Settings > Choose “Manage” next to user Colors. From here, you can create new bubble color relationships for your users. Hex code finder
(Optional) Attach MMS
You may send up to 1MB of mixed MMS (jpeg, gif, png, pdf, mp4) over non-WhatsApp Gateways from Conversation View.
WhatsApp Gateways support singular attachments of up to 16MB.
- Click Upload Files, select a file, and click Done when the file has finished loading
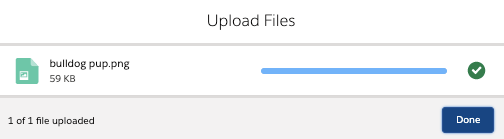
- Click the Send icon


Considerations for MMS:
MMS is currently supported when sent within the US and Canada. International MMS outside of the US and Canada is not yet supported. However, MMS sent internationally will be converted to SMS with a URL link to the media.
PDF and CSV files may not display properly on Android devices.

Receiving MMS
Incoming MMS will appear in real-time within the Conversation View. MMS files can be downloaded by clicking the icon in the lower right corner of the file.
Alternatively, you may click on the text beneath the MMS, where you’ll find the MMS stored within Files and Notes & Attachments.

Considerations for Inbound MMS:
The maximum inbound attachment size is 6MB.
Was this article helpful?