Sending SMS from Marketing Cloud Journey Builder
- 22 Nov 2024
- 2 Minutes to read
- Contributors

- Print
- DarkLight
Sending SMS from Marketing Cloud Journey Builder
- Updated on 22 Nov 2024
- 2 Minutes to read
- Contributors

- Print
- DarkLight
Article summary
Did you find this summary helpful?
Thank you for your feedback
Adding Mogli SMS to a Marketing Cloud Journey
From Marketing Cloud Journey Builder, you can add in SMS activities for outbound message sends to the contacts inserted into your Journey. The guide below will explain what Activity to use and how to configure the SMS send. Any additional setup and configuration is at the discretion of your desired outcome within your Journey and communication strategy.
Please see Salesforce Marketing Cloud documentation on Journey Builder for additional configuration and feature resources.
- From your Journey Entry Sources panel, drag the Salesforce Data component onto your journey builder canvas
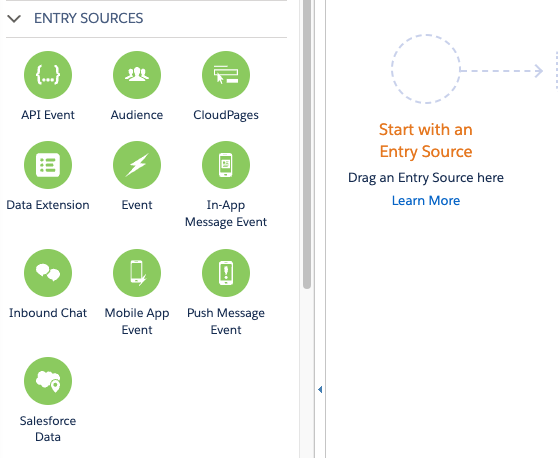
- Double click on the Salesforce Data component to open the Define Entry Source > Select Salesforce Data
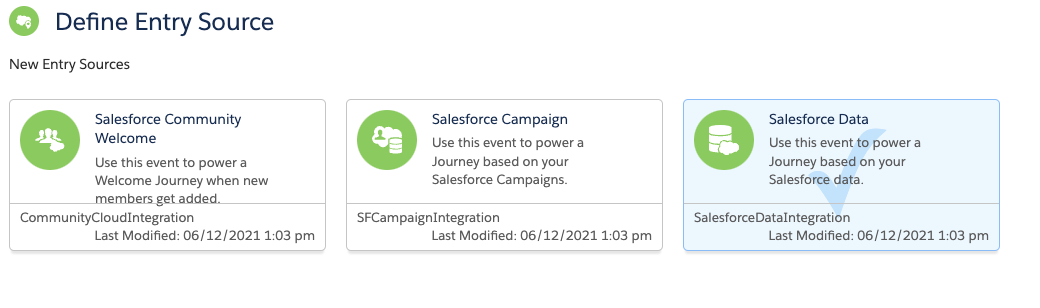
- Click Next
- Set your entry source criteria using the configuration wizard and complete all desired actions until your entry source is defined:

- From your Journey Activities panel, drag the Object Activity component onto your journey builder canvas.

- After placing your Object Activity on the canvas, double-click to edit and open the configuration wizard.
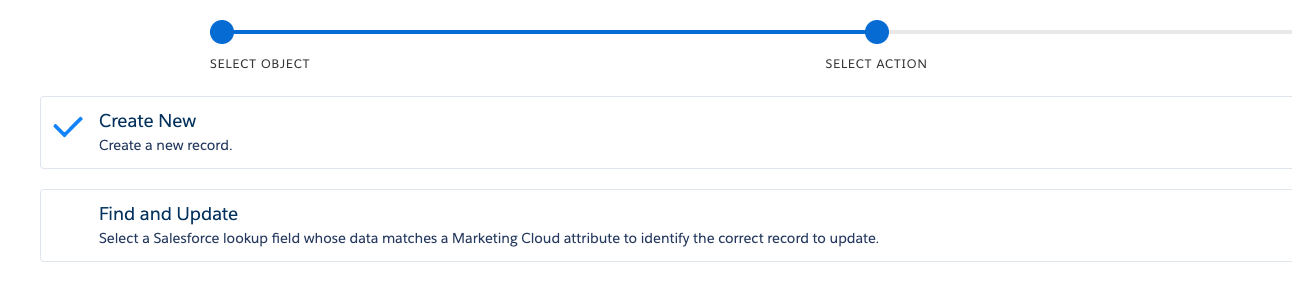
- Search for and select the SMS object. Click the Next button within the wizard.

- Select Action - Create New. Click the Next button within the wizard.
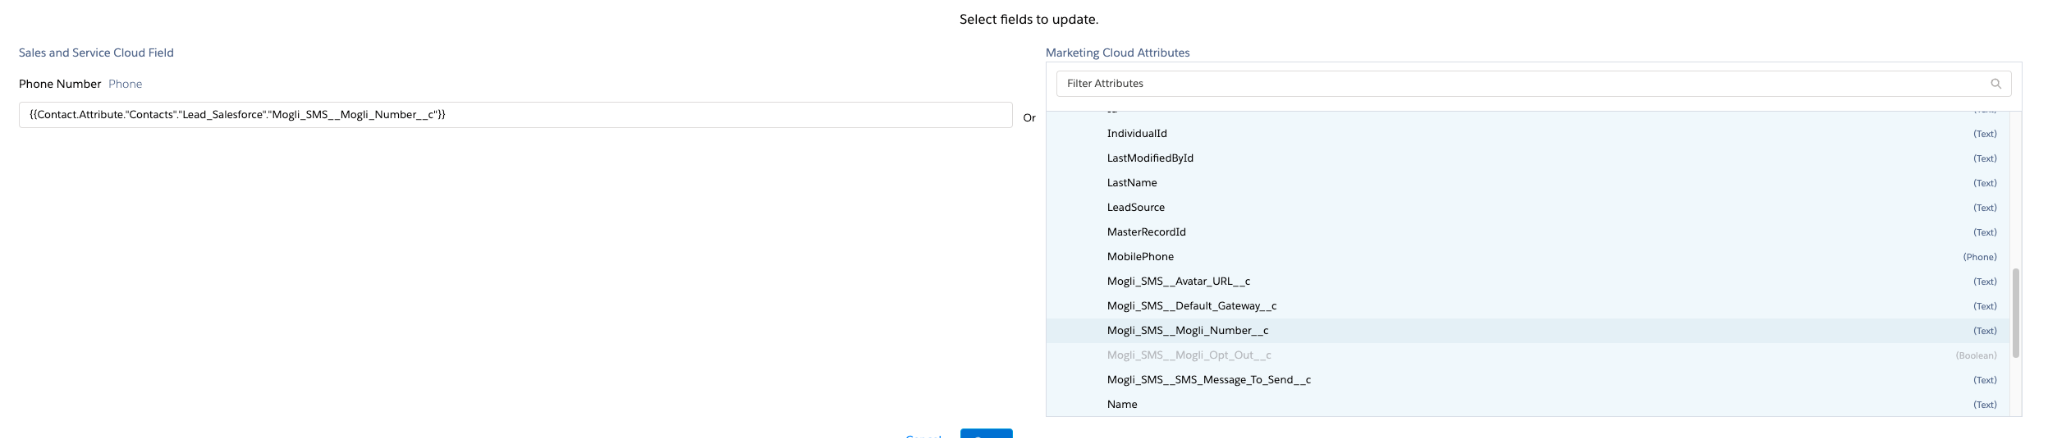
- For base configuration purposes, you must map the following fields:
Note: some fields will have required values that must be set to execute the SMS send- Contact or Lead lookup MUST be mapped (depending on the records you are using as journey contacts)
- Direction = Outgoing
- Gateway = select the desired Gateway that will send this message (you can lookup the Gateway from within the wizard.
- Message = enter the message body here (Text Area Long). You can include merge fields leveraging Marketing Cloud Attributes, emojis, special characters, etc.
- Phone Number = this must be set as the Mogli Number on either the Contact or the Lead. Contact is used as an example screenshot below.
- Status = Queued
 Need to personalize the message body?
Use Marketing Cloud Attributes to merge in personalized data into your text message body. NOTE: Do not use standard Salesforce Mogli Merge Fields (these will not render inside Marketing Cloud as expected - you must set personalization strings from within Journey Builder using Marketing Cloud Attributes)- While editing the Message field mapping, search for and select any available Marketing Cloud Attribute data point you want to use as a personalization merge field within your message body
- Browse through the list to find the specific attribute you want to include. These attributes might include fields like
FirstName,Email,PreferredProduct, etc.
- Browse through the list to find the specific attribute you want to include. These attributes might include fields like
- The field will be inserted with a format similar to {{Example.Attribute}} or %%Example.Attribute%% (if using AmpScript)
- Ensure the text area (message body) has a readable flow with your inserted attributes (e.g., "Hello {{Contact.FirstName}}, thank you for your interest in {{Product.Name}}.")
- When your message body is completed, click Save and continue through the Object Activity wizardTIP: Consider testing the journey with a Test Contact to see how the attributes appear in real use!
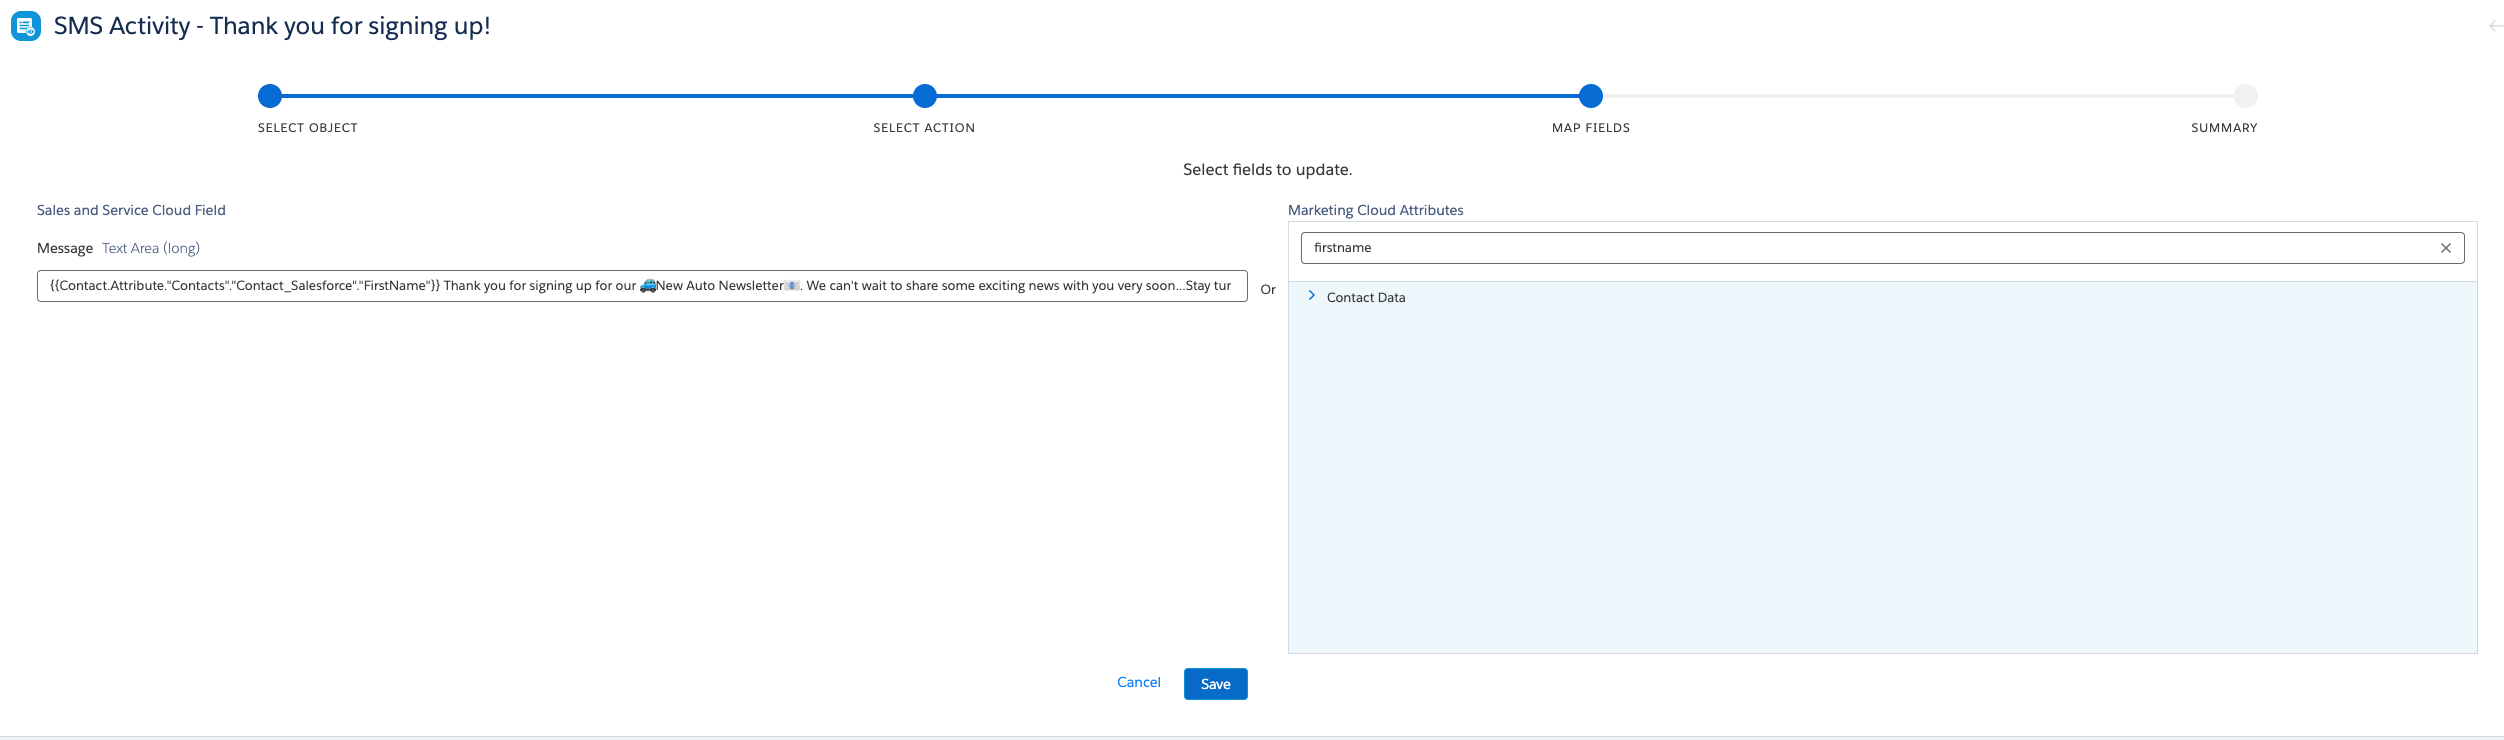
- While editing the Message field mapping, search for and select any available Marketing Cloud Attribute data point you want to use as a personalization merge field within your message body
- Click the Next button in the wizard and review the object data that was just configured.
- Click Done
- If more outbound SMS messages are desired within the Journey, repeat steps 1-8 to set up the Object Activity as needed.


Was this article helpful?